Paso 1: El mas importante, tener ganas de terminar este pequeñito tutorial.
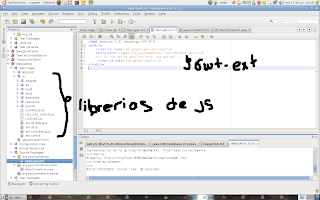
Paso 2: Copiamos las libreria de js-ext, pero se preguntaran donde diablos esta,
http://yogurtearl.com/ext-2.0.2.zip , la reombramos con js y la copiamos a nuestro proyecto dentro de Web Pages
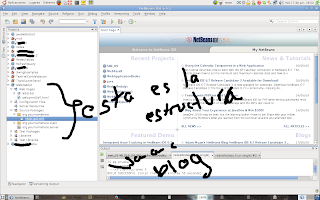
Después debería estar así:
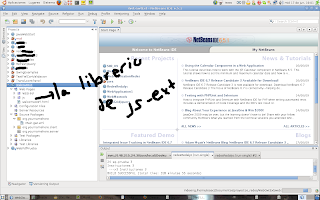
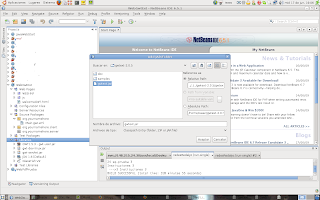
3. Agregamos el jar de gwtext.jar que esta en el zip en libreries de nuestro proyecto:
Dar click derecho en libreries, ADD jar/Folder.
4. Configuar Main.gwt.xml este archivo esta nuestro MainEntryPoint, este tiene quien es la clase principal que contiene el metodo para iniciar una aplicación gwt, debemos colocar lo siguiente tag :
<inherits name="com.gwtext.GwtExt"/>
<?xml version="1.0" encoding="UTF-8"?>
<module>
<inherits name="com.google.gwt.user.User"/>
<entry-point class="
org.yournamehere.client"/>
<!-- Do not define servlets here, use web.xml -->
<inherits name="com.gwtext.GwtExt"/>
</module>
5. Tomen un descanso
6. Configuarar las librerias de js en html o jsp donde va a estar alojada nuestra aplicación gwt, para este ejemplo sera: welcomeGwt.html, primero borren lo que tienen y copian lo siguiente:
<!DOCTYPE HTML PUBLIC "-//W3C//DTD HTML 4.01 Transitional//EN">
<html>
<head>
<meta name='gwt:module' content='org.yournamehere.Main=org.yournamehere.Main'>
<title>Main</title>
<link rel="stylesheet" type="text/css" href="js/resources/css/ext-all.css"/>
<link rel="stylesheet" type="text/css" href="js/resources/css/xtheme-gray.css" />
<script type="text/javascript" src="js/adapter/yui/yui-utilities.js"></script>
<script type="text/javascript" src="js/adapter/yui/ext-yui-adapter.js"></script>
<script type="text/javascript" src="js/ext-all.js"></script>
</head>
<body>
<script language="javascript" src="org.yournamehere.Main/org.yournamehere.Main.nocache.js"></script>
</body>
</html>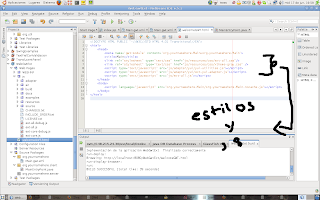 7. Llamen a ala policía escucho ruidos extraños en mi cubículo...
En este paquete org.yournamehere.client hay una clase que es la principal-> MainEntryPoint remplacen su código por este:
/*
* MainEntryPoint.java
*
* Created on 17 de junio de 2009, 06:39 PM
*
* To change this template, choose Tools | Template Manager
* and open the template in the editor.
*/
package org.yournamehere.client;
import com.google.gwt.core.client.EntryPoint;
import com.gwtext.client.core.RegionPosition;
import com.gwtext.client.widgets.Panel;
import com.gwtext.client.widgets.TabPanel;
import com.gwtext.client.widgets.Window;
import com.gwtext.client.widgets.layout.BorderLayout;
import com.gwtext.client.widgets.layout.BorderLayoutData;
/**
*
* @author isaac
*/
public class MainEntryPoint implements EntryPoint {
/** Creates a new instance of MainEntryPoint */
public MainEntryPoint() {
}
/**
* The entry point method, called automatically by loading a module
* that declares an implementing class as an entry-point
*/
public void onModuleLoad() {
TabPanel tabPanel = new TabPanel();
tabPanel.setActiveTab(0);
Panel tab1 = new Panel();
tab1.setTitle("Bogus Tab");
tab1.setHtml(getBogusMarkup());
tab1.setAutoScroll(true);
Panel tab2 = new Panel();
tab2.setTitle("Another Tab");
tab2.setHtml(getBogusMarkup());
tab2.setAutoScroll(true);
Panel tab3 = new Panel();
tab3.setTitle("Closable Tab");
tab3.setHtml(getBogusMarkup());
tab3.setAutoScroll(true);
tab3.setClosable(true);
tabPanel.add(tab1);
tabPanel.add(tab2);
tabPanel.add(tab3);
//west panel
Panel navPanel = new Panel();
navPanel.setTitle("Navigation");
navPanel.setWidth(200);
navPanel.setCollapsible(true);
BorderLayoutData centerData = new BorderLayoutData(RegionPosition.CENTER);
centerData.setMargins(3, 0, 3, 3);
BorderLayoutData westData = new BorderLayoutData(RegionPosition.WEST);
westData.setSplit(true);
westData.setMargins(3, 3, 0, 3);
westData.setCMargins(3, 3, 3, 3);
final Window window = new Window();
window.setTitle("Layout Window");
window.setClosable(true);
window.setWidth(600);
window.setHeight(350);
window.setPlain(true);
window.setLayout(new BorderLayout());
window.add(tabPanel, centerData);
window.add(navPanel, westData);
window.setCloseAction(Window.HIDE);
window.show();
}
private static String getBogusMarkup() {
return "
Lorem ipsum dolor sit amet, consectetuer adipiscing elit. " +
"Sed metus nibh, sodales a, porta at, vulputate eget, dui. " +
"In pellentesque nisl non sem. Suspendisse nunc sem, pretium eget, " +
"cursus a, fringilla vel, urna.";
}
}
Primero crea un TabPanel con tres pestañas y después es agregado ala ventana en la posición del centro atravez de:
BorderLayoutData centerData = new BorderLayoutData(RegionPosition.CENTER);
centerData.setMargins(3, 0, 3, 3);
También contiene otro panel en zona oeste que es agregado a la ventana con:
BorderLayoutData westData = new BorderLayoutData(RegionPosition.WEST);
westData.setSplit(true);
westData.setMargins(3, 3, 0, 3);
westData.setCMargins(3, 3, 3, 3);
8 . Run al archivo welcomeGwt.html despues tendran algo como esto:
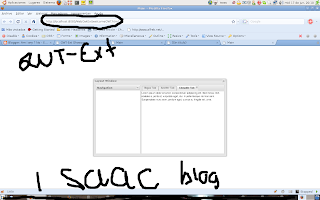
Como ven es facil se pueden hacer aplicaciones bastantes vistosas, ademas de ser rapidas, depues explicare como comunicar estas GUI mediante RPC con aplicaciones cliente servidor...
Continuara


